Progress so far:
As most of you know, I am obsessed with stained glass circles! I’ve created more than 100 in the past year, 45 just in the past 3 weeks:
In September 2016 I created my first stained glass circles project, consisting of 2 frames of circles bolted together. Each panel is beautiful by itself but spectacular when layered:
This past weekend I was home sick with a nasty cold [I was supposed to be in Washington DC all weekend visiting my bro and his kids, but I had to postpone my trip – MEH!]. I spent most of the weekend in bed, but went a little stir-crazy & finished my 2nd stained glass circles project. It was my plan all along to create 2, one for each south-facing window in the master bedroom.
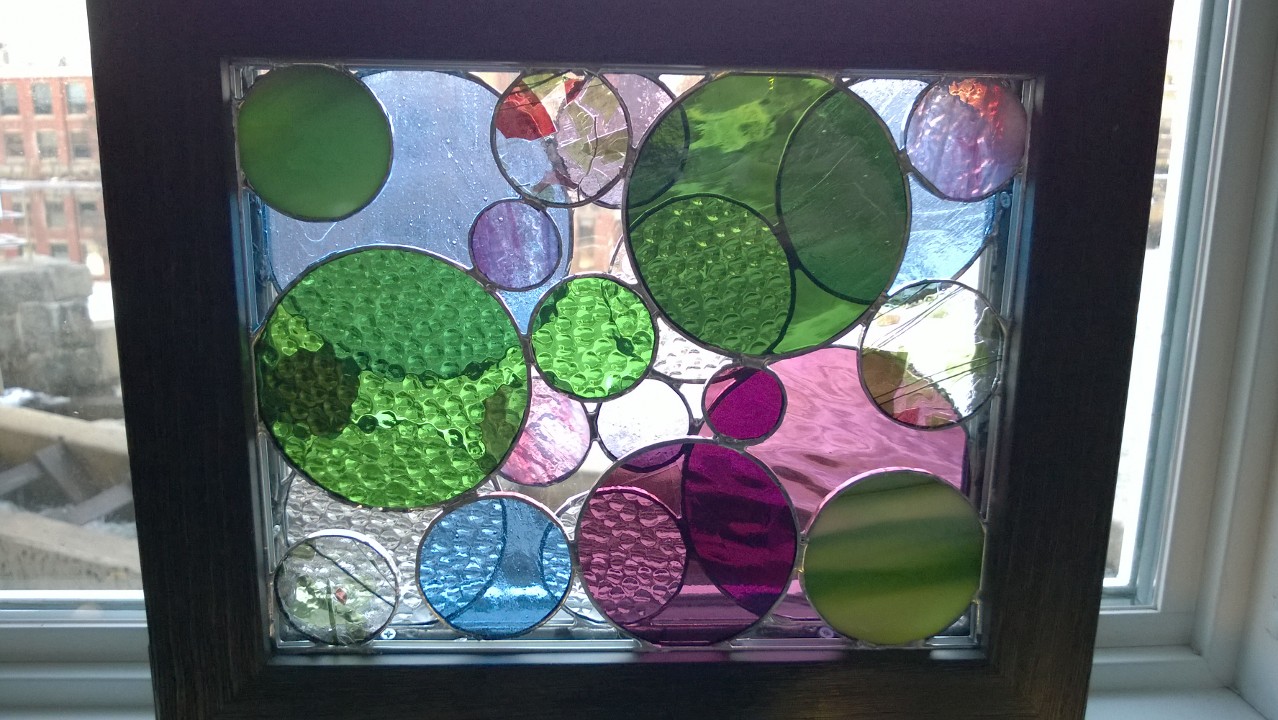
As you may remember, at the end of January I created 2 metal-framed stained glass circle panels [I create the metal frames to slot perfectly into black picture frames from Michaels]. I thought I’d be layering them:
But they didn’t have enough diversity of color:
So this past weekend I finished a green & pink themed frame to layer with one of the above panels from January. And I got to try out the new toy I bought for the girl cave – a light box! Although it’s not a box at all. Back in the day light boxes [aka light tables aka tracing tables] were actual boxes with lights inside and a glass top. They have come a long way since then! The one I bought [#affiliate] [for only $34 on Amazon] is a flat LED panel very much like a laptop screen. It has 3 levels of brightness and is PERFECT for stained glass projects. Now I can see how pieces will look layered together. Here it is on my workbench both off & set to super glowy:
It’s powered by a USB cable so I had to buy a new power strip with USB ports for the girl cave. But it was a worthy investment because the new iPod and speaker hubby got me for Christmas also require USB ports. Now I can have my light box AND tunes in the cave while I work:
I grabbed the circles I wanted to use and layered them on the light box to see how they looked:
Then I cut & soldered a metal frame for the new panel:
I lay my panel from January on the light box, then started layering the new circles on top. Once I liked how they looked I soldered them to the new metal frame. I kept moving the new frame back to the light box on top of the old frame to test out different configurations of circles, then moving the new frame to my work board so I could solder a few more circles in place. I kept going until it looked finished:
Then I screwed both metal frames into black picture frames from Michaels and connected the 2 black frames together:
The new layered circles project [left] looks great hanging in the bedroom adjacent to the original one [right]:
I have since taken the 2nd frame apart. I’m planning to create new frames to attach to each part of the 2nd dual frame because after living with it for a bit, I decided it was too busy and didn’t have enough colors in it.


Spectacular!
Thanks!
Very cool. I hope you get to go to Washington soon!
I moved my trip to Memorial Day weekend – a beautiful time to enjoy the city!
Very nice circles.
Sehr schöne Kreise.
Liebe Grüsse
Danke Daniela!