
This past May I spent about 6 weeks completely cleaning and overhauling the girl cave. I removed 2 large trash bags of crap, and moved a bunch of stuff to the basement for storage. I didn’t take any “before” pictures, because, well, I guess since I wasn’t really in a blogging mood I also wasn’t thinking ahead to “before” pictures. So I have grabbed some from previous posts.
Why not start at the WAY beginning. Here’s what the girl cave looked like when my husband first bought the condo in 2009, 2 years before he met me [photo courtesy of Pop]:

It looks SO MUCH SMALLER in that pic!!! OMG! Here’s a couple from when I first moved in, back in February 2012, before I knew I was a DIY Queen. That’s my computer desk on the right and my art/drafting table on the left:


My main condition for moving in [I was renting when I met my husband, so it made total sense for me to move in with him] was that the 2nd bedroom would be MINE. I needed a girl cave. My husband [for a while anyway] assumed it would also remain a guest bedroom, bed included [cackle]! We later compromised on an air mattress that we set up in the girl cave as needed.
Here’s a couple from April 2016 after I bought my awesome workbench. I forgot I had one of the cat trees in the cave with me! That’s poor Bonkers [RIP buddy we ♥ you!] on the floor and Darwin on the workbench:


Here’s 2017 when Birdie officially lived in the cave while I built her extravagant platforms:


This is pretty much what the cave looked like this past summer before the overhaul [minus the litter box on the art table]. Picture the art table & workbench stacked high with crap instead, and crap in bags all over the floor:

Part of the overhaul included securing a thick piece of clear shower curtain liner to the bottom half of the red bookcase. Inside are all my art painting supplies. I don’t paint as often now that I’ve discovered stained glass, and I didn’t like my supplies collecting dust:


Dust was a major part of the overhaul. Birdie’s litter box is in the girl cave, and we use Wheat Scoop which is compostable but very dusty. A layer of [clean!] litter dust was coating everything, including all my art glass:

I removed every piece and washed it in the kitchen:


Including ALL THE LITTLE SHARDS, which used to live in uncovered plastic paint tubs – they were swimming in dust & took forever to wash:


Now the shards live in covered, labeled, plastic, dust-free tubs:


All orderly on the bottom left of the built-in:


Speaking of the built-in, before buying glass racks [if you have any art glass I highly recommend glass racks/glass caddys [#affiliate] – they RULE!]:

I stored the glass straight on the shelves, which caused major paint scratching:


A little BM Amethyst Shadow [I love having my paint in mason jars – no more stirring, just shake shake shake] and I was back in business:


I also added about 5 coats of Polycrylic top coat.
And glued foam backboard to the bottoms off the glass racks/caddys for extra scratch protection:


The final step was adding another piece of thick, clear plastic shower curtain liner to cover the center shelf where all my colored glass is on 3 glass racks/caddys:

Look at this crazy glass shard that fell and embedded itself upright in my 2 layers of new paint and 5 layers of Polycrylic coating:

I’m leaving it there. It’s beautiful. Dangerous, but beautiful. It’s behind the clear shower curtain liner, so it won’t hurt anyone.
I also dusted my knickknack shelves:


And scrubbed years of paint off the floors [which were new in February 2012]:


So that they [mostly] sparkle! I still have a few spots to do, but they’re so much better:


The last step was removing my art/drafting table and using that space for a much larger litter box area for Birdie. She doesn’t like litter boxes. She prefers to go on puppy pads. But not always. Sometimes she’ll pee in the litter box and poo on the puppy pads. Sometimes she’ll poo in the box & pee on the pads. Or any combination thereof. To be honest, I’m just thankful she goes in her dedicated area and not willy nilly all over the house! To prevent damage to the wooden floors from pee that misses the puppy pads, I bought 2 large rubber floor liners [#affiliate]. There’s a layer of puppy pads under those. And another layer on top. No more damp-floor accidents:

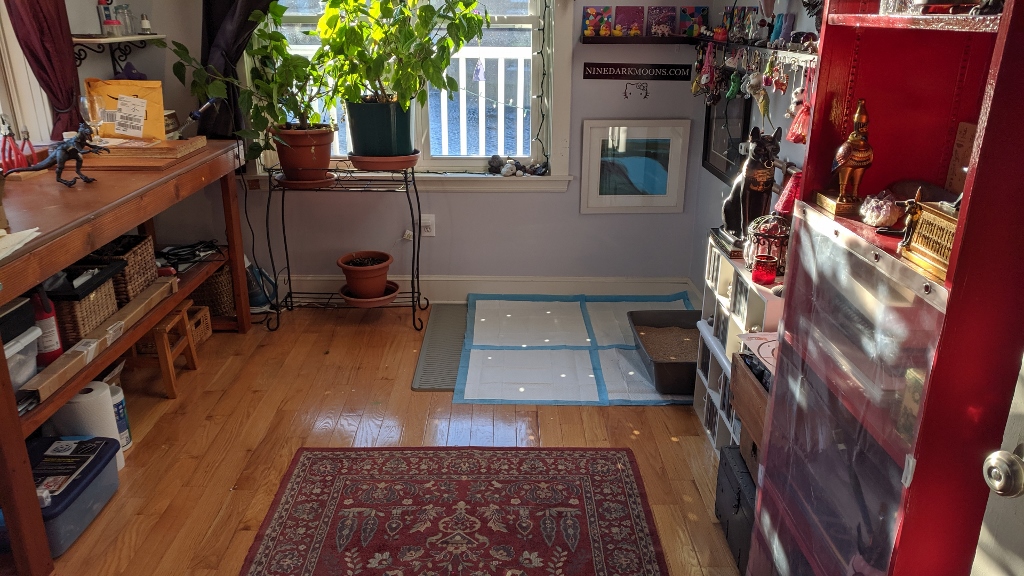
So here’s what the girl cave looked like this past May when I was done:


And yesterday when I took pics and finally started this post about it:

It is once again a haven of calm and creativity 🙂
Ali it’s amazing how creative and organized you are all at once … not a common combo!
HA HA HA true!
You may have to talk me thru doing parting with useless “crap”! Ha ha
What a beautiful space! The light is so great, and it’s so organized! I’m very jealous! 🙂
The light is fantastic, and the breezes are amazing in the summer 🙂
Wow – the changes over the past few years are amazing – and no matter how you set it up, that room’s always fascinating!
I love my girl cave 🙂