The pictures pretty much speak for themselves, so I’ll keep it short. Here’s a shot from my basement workshop last week – it shows the girl cave AC box frame acting as a drying rack for 4 of the rigid insulation panels, as well as the laser cut wood panels hanging in the background:
I painted the door frames & spray painted the laser cut wood panels over the past couple of weeks:
Putting the doors together involved first screwing the laser cut wood panels to each frame and then screwing the rigid insulation panels on top:
Once the doors were ready, I placed them onto the box frame and screwed on the hinges & the magnetic door catches:
Here’s a “before” shot of the girl cave AC [WOOF!]:
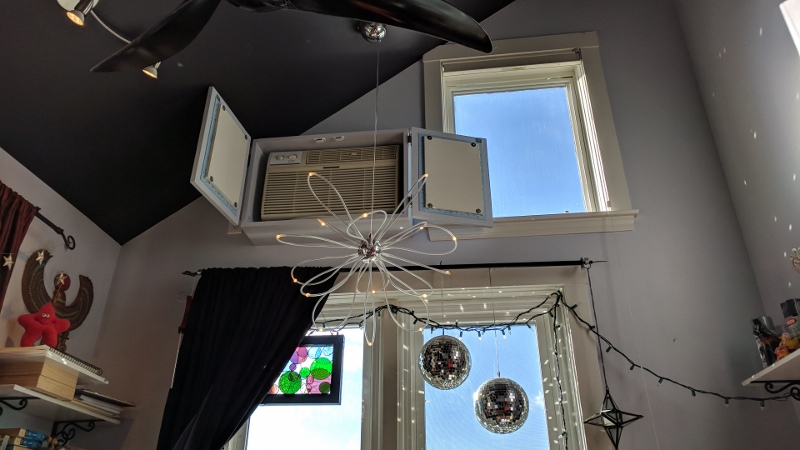
And the “after” shots:
The angled ceiling prevents the left door from opening as wide as the right, but whatever – it won’t affect the box’s functionality, and the doors will only be open when we’re actually using the AC which isn’t often.
As with the living room AC box, I secured the girl cave box to the wall with a bit of caulk & an L-bracket at the very top:
Those with sharp eyes may notice something weird between the doors – it’s a piece of wax paper. The doors fit pretty close together and I didn’t want them to fully cure without something to keep them separate!
I ended up removing the doors last month, repainting them, and adding cardboard spacers behind the hinges so they wouldn’t close together so tightly.


Two down, one to go! This one looks pretty high. How will you open and close it?
That’s what I was wondering, too. I like the color!
I can reach the AC doors and dials by using a stool to climb up onto my work bench. Hubby can reach it just by standing on the stool. Worst case I use a ladder 🙂 Thankfully the bedroom one, which is also really high, has a remote. But if the girl cave one ever had a remote, it’s long gone.
Be careful climbing up there!
i need a better system! getting up onto the workbench is easy enough, it’s the getting back down that’s tricky…
Beautiful – very professional. And I’m really impressed w/the slide show!