
Last month I ordered a Pegboard Kit [#affiliate] from Amazon. Instead of being wood composite, like most pegboard, it’s black plastic. I got the idea from Houzz [I’m not sure if theirs is black plastic or black painted wood, but I loved the look of the black pegboard]:

[That laundry room is bigger than our living room… Just saying.]
My first plan was to hang the pegboard in the Girl Cave, since that’s my sometimes workshop. But there’s really not enough free wall space in there unless I move some of my art stuff, which I didn’t want to do. Then I decided I’d hang it on the wall at the top of the basement stairs, since the basement cage is my main workshop [there’s nowhere in the cage to hang it, and I wouldn’t want to anyways, because it floods].
Finally, sometime on Saturday, I decided our first-floor LAUNDRY ROOM would be the perfect spot. It has a large, mostly free wall across from the shelves and washer/dryer. It’s centrally located between the basement and Girl Cave, and, most importantly, it’s warm and dry. We currently have been storing tools in a Rubbermaid bin in the living room TV cabinet… and in the Girl Cave… and in the basement cage… and on random tables & shelves throughout the house. It drives me crazy when I need a hammer [we have 3] or measuring tape [we have 2] and I have to look in 8 different places just to find one of them!
On Sunday morning I relocated the broom rack from the laundry room wall to the top of the basement stairs [right off the kitchen]:


That freed up the entire wall in the laundry room for my pegboard.
I did a lot of measuring, and drew pencil lines on the wall where I wanted the pegboard to go. The Pegboard Kit came with 4 pegboard panels [each panel is 12×24″], screws/anchors, and an assortment of tool hooks for the board. I held up the first panel, lined it up with my pencil lines, and tried to use a pencil to mark the spots where I’d need to drill holes. But the pencil wouldn’t fit through the pegboard holes! Here’s a re-enactment:

I searched the house and couldn’t find a pencil, pen, or marker that would fit through the holes enough to mark the wall. Then I tried an awl [screw driver thing with a point on the end], which DID fit through the holes, but I couldn’t get enough leverage to make a dent in the wall. D’oh! And hubby was at the gym so I couldn’t enlist him to tap the awl with a hammer for me. So I got creative and used a Q-Tip and some white paint:

The Q-Tip DID fit through the pegboard holes, which you can see in this exciting re-enactment:

And made nice, visible marks on the wall so I’d know where to drill the screw holes for each panel:

The first panel went up quickly and easily:

Followed by the remaining 3:

That’s hubby grinning his approval from the kitchen side of the laundry room door. You can configure the 4 panels any way you want – the kit comes with black plastic sliders which connect each panel to it’s neighbor. It comes with long ones and short ones in case you want to connect them up and down instead of side to side like I did.
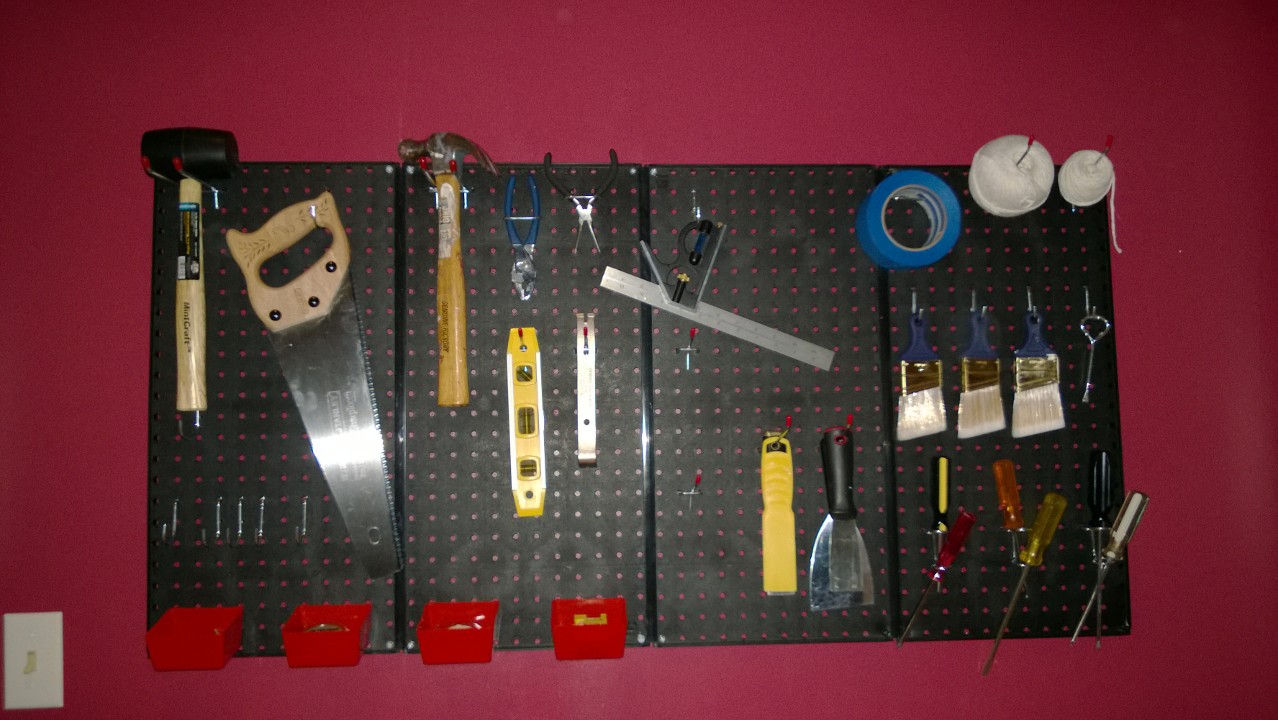
Then it was just a matter of adding the hooks & tools:


Here’s what it looks like from outside the laundry room:

Swanky! It was so easy to hang and set up. I love how it looks, especially in our raspberry laundry room!
Ali, because our lives are so oddly consistently parallel… you’ll never guess what I recently added to our basement!
Pegboard!
I like the pegboard. Good for you for hanging all by yourself! We need one in the basement workshop, but then we need a lot of things down there. I also covet your contraption for hanging the mops and brooms. We currently have random hooks hanging on the wall down to the basement, but I want to move them into the hall closet… once I redo it that it. It could be quite a while before that happens!
I think hubby picked up that broom hanger thingy at Marshall’s or Homegoods. We’ve had it for a couple years – it’s pretty neat!
I have pegboard here in FL and pegboard in MA and still have to look in eight different places. Dad
Ya, it’s really easy to just leave tools laying around!!! I’m going to try to hang them back up on the board…
Nailed it again (no pun intended) – it looks great on that background and will make your life SO much easier. Good job!