Progress so far:
So far I have made 20 stained glass stars! HOLY COW!
Almost exactly a year ago I was busy making stained glass stars for the holidays. I decided to have fun with a few of the smaller ones and decorated them like snowflakes:
This year I decided our house needed MORE snowflake stars. I grabbed 3 of last year’s larger stars and brought them up to my workshop:
At first I decided to add swirls to all 3. I carefully crafted each swirl with needle nosed pliers:
I made 12 [4 per star], then soldered them on:
But after seeing them hanging in the window I decided it was too many swirls. I took the blue star back upstairs and heated up the solder holding on the swirls until they fell off. Then I made 5 large circles by wrapping my 16 gauge pre-tinned wire around the post of a Whitmor shelving unit [#affiliate] in the basement:
I made 5 smaller circles by wrapping my wire around a small Maglite flashlight:
I soldered the large circles to the star first, then went back and nested the smaller circles inside. It was very hard to get them straight! But I did it and I think it’s very pretty:
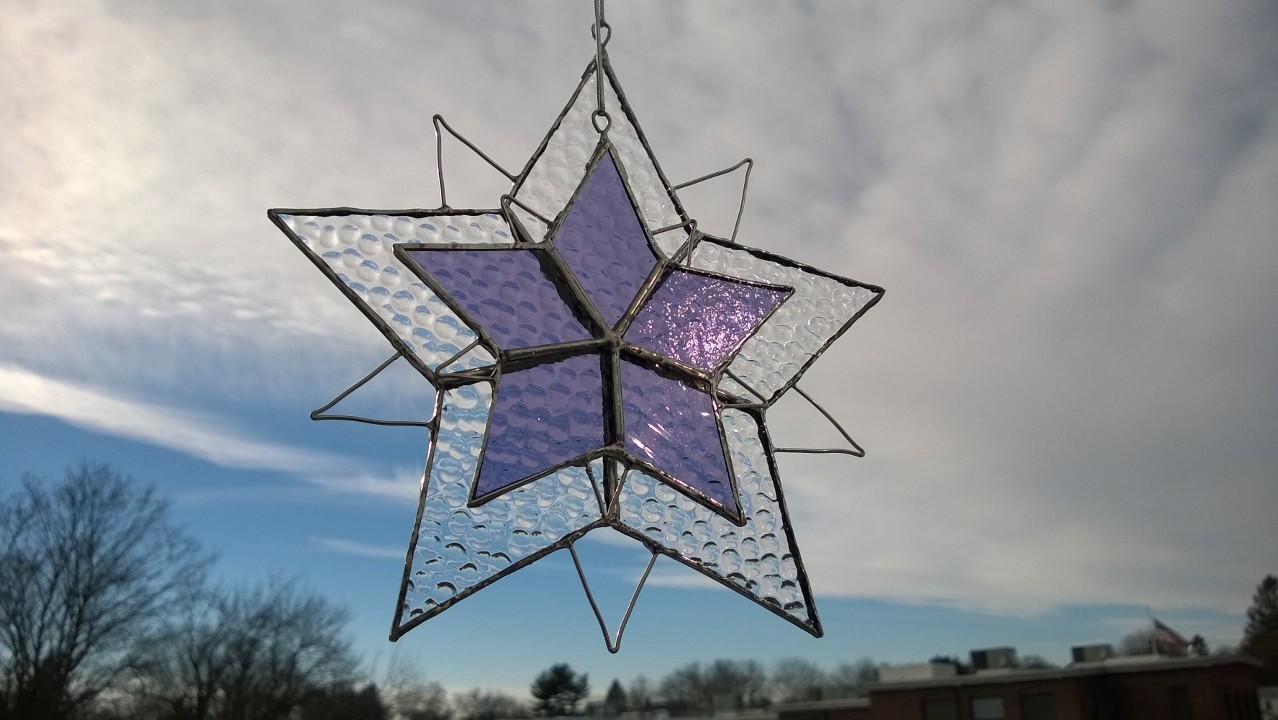
Then I took the small purple one from last year [pictured at the top of this post] and snipped off the prongs. Too sharp. Then I crafted 5 small triangles and carefully soldered them on:
It looks beautiful in the window:
Then I grabbed a large “bubble glass” star from last year and embellished it the same way. First I cut 5 equal lengths of wire, then folded each in half with needle nosed pliers:
Then pried them back open into triangles with my fingers. Next up was anchoring the bubble glass star between 2 blocks of wood, painting on lots of flux, positioning a wire triangle with needle nosed pliers, then soldering it onto the star:
I love it!
Here’s our living room window displaying all the snowflake stars [and the guardian angel my German sister made me last year]:
I love how glass looks layered – holding 2 snowflake stars together made for some cool effects:
As an aside, I’ve gotten tired of looking at my ugly plywood soldering board. The greasy flux stains & solder burn marks detract from any photos I try to take!:
So yesterday I primed it with 2 coats of BIN primer, then painted it with 2 coats of white trim paint:
SO much better:


Your work is getting better and better and it was wonderful to start with. The complex shapes are so pleasing. Jo @ Let’s Face the Music
Thanks so much, Jo! Merry Christmas to you and Charlie!
The layered ones are gorgeous! I love how they all look in the window.
Thanks, Jessica!
You’re so creative and talented – your stars just keep getting better and better. The grouping in your living room window is spectacular.
Thanks, Mom!
So beautiful!
Thanks, D’Arcy!