
Currently 2 of the 3 AC xox frames I made last March are wrapped in plastic to keep the cold out. I never knew how much air blew in through our [in-wall] ACs until last week during the bitter freeze. Brrrr! So I temporarily wrapped the living room & bedroom boxes in plastic [we shut the girl cave door when it’s cold so I ignored that one]. It made me realize we need insulated† AC doors asap! So yesterday I got started and built one set. I’d already bought the wood last March so I just had to measure & cut:


They looked great when laid out on my work table:

I used my Kreg Jig to drill pocket holes in the smaller pieces:


And clamps to screw the pieces together into frames:


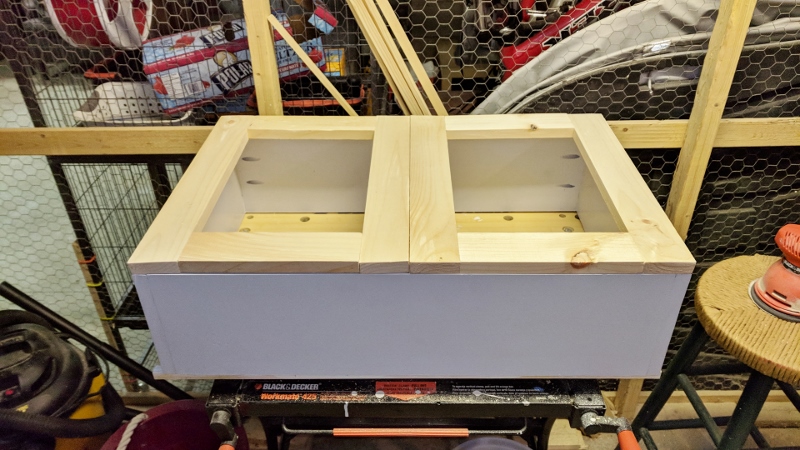
I climbed up the ladder in the girl cave and pulled that box off the wall to use as a door template. The doors looked so good when laid on top:

Last night I added a coat of primer to the first set of doors & called it quits:

This morning [it’s Martin Luther King Day so no work] I built the 2nd & 3rd sets of doors. I ran into 3 problems, 2 with knots:


And 1 with a cracked piece of wood:

I had to re-cut all 3 pieces and reattach them to my frames. Then I used wood glue to glue Kreg plugs into the pocket holes:


Tomorrow I’ll be able to sand them down flat with my orbital sander and finish priming the doors.
The last step was dry-brushing primer onto the 6 door panels I bought at Michael’s last year. I had aaaaaaallllllllllllllllllllllllllllll spring, summer, & fall to spray paint them, but no… I procrastinated. And I don’t own a paint sprayer, so now I’m stuck dry-brushing them. Which actually worked really well, it just took a very long time. To let them completely air dry I screwed 6 long screws into random parts of my workshop cage and hung them to dry overnight [the primer is white but in the pictures they still look wood colored]:


Tomorrow I’ll be able to dry-brush them with wall paint to match the living room, girl cave, and master bedroom, then staple them inside each door frame:


Hooray for progress!
† I hadn’t realized we’d need insulation on the back of the doors until last week, so I ordered some oven-mitt material on Amazon [#affiliate] which will be here Friday. I’m planning to staple that onto the backs of the pretty panels. It won’t look as great as without, but it’s a definite necessity!
I ended up using pieces of rigid insulation on the doors, not the fabric.
Great job, as always. With the addition of insulation, they’re going to be practical as well as beautiful.
I hope so! I’m excited to get them done (finally) and hung on the walls!
Great job! It’s going to make a big difference on how much air comes inside. Again, great job. Luv, Dad
Thanks, Dad, yes it should make a huge difference 🙂
It’s a good thing you got something to cover the holes. As soon as I saw those pretty panels, I thought that they are going to let a lot of cold in. You did a great job on the doors.
Thanks, Jessica!