I HATE when I make rookie mistakes. I’m guessing we all do. For the past month* I’ve secretly been working behind-the-scenes cutting wood & getting ready to build the 3 wooden box covers for our in-wall AC units. So in addition to all the painting I’ve been doing on the tall bookcase, I’ve also been doing a lot of painting on the AC covers. I was SO careful to measure twice and cut once. The in-wall AC units are thankfully all the same size. I’m basing the design off the cover Vintage Meets Glam made for her in-wall AC unit.
Each of our ACs is encased in a metal frame. The metal frames measure 26 x 155/8 x 7″:
I decided to make my wooden box frames 26½ wide x 16¼ tall x 8″ wide, which would leave enough room to tuck the cord up inside when not in use. I estimated I’d need 159″ [just over 13′] of 1×8″ pine:
I went to Home Depot last weekend & bought 4 1x8x6′ pine boards, giving me 24′, just to be on the safe side. Good thing I did because I screwed up the first few cuts by not taking into account the width of the table saw blade. But that wasn’t my rookie mistake. My rookie mistake was not factoring the ¾” width of each board into my measurements… D’OH!!! Stupid stupid stupid!!! I know better. I blame my recent stress/distraction on Nibbler dying & Franc’s abscess.
So anyway, not realizing my mistake, I forged ahead. On Sunday afternoon I cut each board down into the 12 lengths I needed. 6 long lengths & 6 shorter lengths:
After realizing I needed to take the saw blade width into account, I started drawing an extra line on each board and aiming for that line when I made each cut. That way I only had to sand off a tiny bit after the cut to get the board exactly where I wanted it:
Soon I had a perfect little stack of boards:
I spent the past 4 days priming & painting them all. I painted one set of boards Benjamin Moore Sycamore Tree to match the living room walls, one set BM Violet Mist to match the girl cave walls, and one set BM White Dove to match the master bedroom walls:
I was so excited to get home from work today and build all 3 boxes. I got my Kreg Jig and my drill and got to work making pocket holes in the living room boards and connecting them together:
Birdie even came over to see what I was up to:
After the pocket holes were drilled I used my drill & the Kreg screws to attach the 4 boards together into a box. The awesome part about Kreg jigs is all the pocket holes are on the inside of the box:
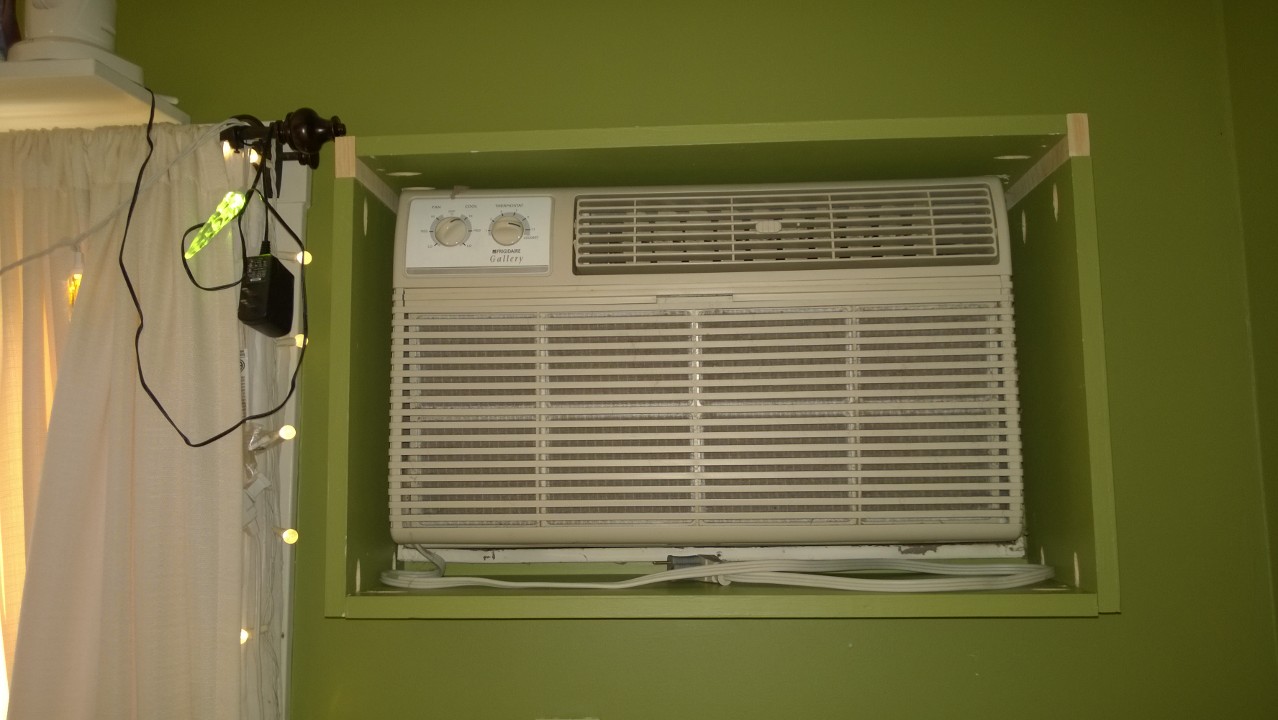
Then it was time to hold it up to the living room AC unit & see if my measurements were true [which as you know they were NOT]. Here’s the AC without the cover:
And here’s what happened when I held the cover up. It was too short side to side, but perfect in length:
I decided to take the box apart & screw it together the other way so it would fit side to side but be too short length wise, so I could see how much length I needed to add:
As you’ve probably guessed, I needed to add 1½” to account for the ¾” thick wood. I went back down to the basement cage & used the table saw to cut 6-1½” lengths, 2 for each AC box. Then I used the Kreg to attach them to the side pieces and rebuilt the AC box:
And look at this – perfect fit!!!
I took the box back off the AC and brought it down to the cage. I sanded the edges & used wood filler to patch it up. Tomorrow I’ll prime & paint the parts that need it:
Then I’ll be building doors for it, and eventually attaching it to the wall with z-clips. I’ll also be working on putting together the other 2 boxes. Never a dull moment with DIY…!
* I’ve only been working on the boxes for a week but I’ve been working on other parts of the project for a month 🙂


Mistakes happen. Good for you for sticking with the project. I probably would have given up!
Thanks, Jessica! I’m not sure I’ve ever given up… I’m too stubborn!
Can’t wait to see what you use for a cover piece – your camouflaged ACs are going to look beautiful!
Thanks! There is a hint on my 2017 Projects list as to what I’m using for the doors, but until I know they’ll work and look decent, I won’t post here 🙂
Had a few mistakes in my day, but when you look back it’s only a speed bump. Nice recovery with the extensions, that’s really neat. I wish I had a Kreg Jig in my day. It would have made life easier. Love, Dad
The Kreg jig is amazing. I’m so thankful Abbie & Briggs gave me one, it’s been a life changer! Yes, only a speed bump. It’s helpful having a table saw – makes it so quick & easy to cut things like those extension pieces.
Neat idea! Can’t wait to see what you do for the doors. I hate looking at our ugly ACs, but I can’t live without ’em! Maybe it’s time to camouflage them.
Yes, camouflage is key! I couldn’t live without them either. But in-wall ACs are just UGLY!