
A couple months ago I started crafting a key rack for all our wayward keys. It’s a simple piece of 26×2½x¾ pine that I cut, primed, & painted white. You can see it on the left of my workbench as I worked on stained glass last November:

Last week we had a new front door installed by a local contractor [more about that later], and we needed to make copies of the new key. However, before leaving for the hardware store today, I had a minor panic attack at the amount of wayward keys all over the house. I didn’t want to bring in more keys until I had a handle on the current key situation. To give you an idea of what we’re dealing with, we now have 4 outer doors [front, back, yard, & deck] and each door has it’s own set of keys, which were tossed randomly around the house. We also have a key for the basement door, extra car keys and motorcycle keys, keys for our back gate, keys to friend’s houses, etc. – so many keys!!!
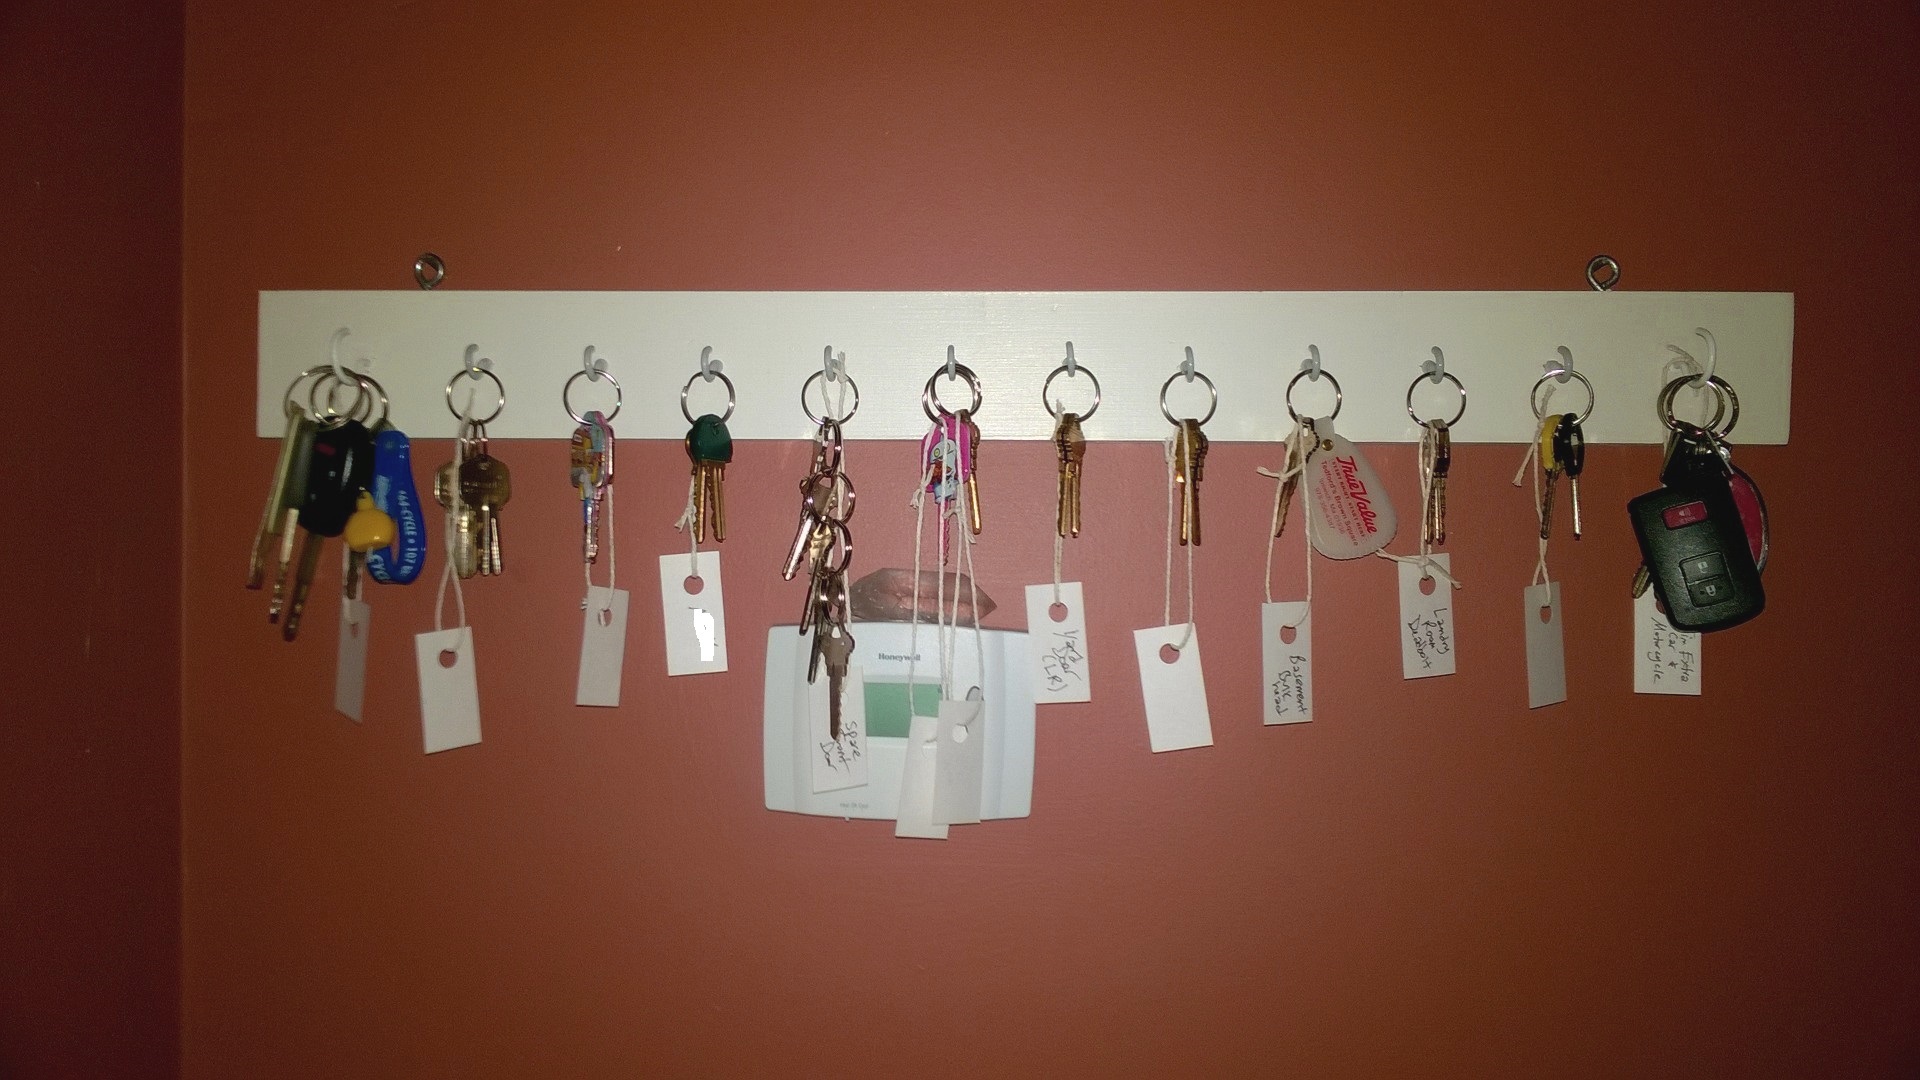
So before we went to the hardware store I made hubby wait while I finished the keyrack, rounded up all the keys, figured out what door they went to, labeled them, and hung them on the new key rack. Hubby is very patient 🙂 Love you, hubby! I hung the key rack on the wall in the dining room, above the thermostat:

To back up a little, I started by flipping the pine over and measuring a mid-line down the center, which I marked with pencil. Then I made pencil marks every 2″ along the mid-line and used a small drill bit to drill through-and-through holes:

I flipped it back over and carefully screwed hooks into each hole. Then I screwed hanging hooks into the top of the key rack and hung it on the wall:

The hooks I used are “mug hooks” – they’re pretty and look like ceramic:

I only had 10 “mug” hooks and 12 holes, so for the hooks on each end I used slightly larger white metal hooks. They’re actually perfect hooks for our extra car and motorcycle keys, since those are heavier and more numerous:

Next up was labels. I measured 1×2″ rectangles on a piece of card stock, cut them out, punched holes in them, and attached them to each key ring with string:


The whole project only took a few hours, the majority of that time was spent cutting, priming and painting it. To get it from painted piece of wood to fully functional key rack this morning only took about 45 minutes, including the time it took to make the labels. There’s currently one key that I know goes to something but I can’t figure it out, so that’s driving me a little nuts. But as far as the rest of the keys, I am thrilled they’re finally corralled!
And the hardware store had Ugly Doll keys, which are AWESOME. Jim and I got our door keys made from those. As far as I can tell, I have Babo, who is startled on the front and hoarding cookies on the back:


And Jim has Ice Bat who is startled on the front and flying on the back:


I agree with Jessica. We used a locksmith a couple of years ago and now carry one key for the front door, cellar door, and condo. It makes life SO much simpler.
We’re thinking about it. The only door we actually come in through is the front door. The yard door we go out/come in, but usually it’s locked from inside with the dead bolt.
Love your key rack and scary, I mean ugly, keys. You’ll be so happy they’re all corralled in one place. Jo @ Let’s Face the Music
My anxiety levels have dropped dramatically since the keys have been corralled and labeled! This issue has been bugging me for over a year. I love the Ugly keys, too – kind of silly and they add a little color to our drab key rings!
You should get your locks changed so that your exterior doors take the same key. It would make things much easier.
we thought about that. we had that done 3 years ago and had a really bad experience with the locksmith. since then we’ve gotten 2 new doors (yard and deck) and now the new front door. we pretty much only use the front door – the other 3 we lock with deadbolts from inside. we’re thinking about doing it again with a different locksmith.