
I spent 10 hours this weekend in the basement. I tidied up the common areas [shared by the 3 condos in our house], cleaned our cage, and claimed ownership of a “no man’s land” storage area that was previously buried under junk. So much junk! It was exhausting. I am still sore. But it was so worth it! Hubby was out of state visiting a friend Saturday and Sunday morning, so I got to organizing! I always do my best work when he’s out of town nods.
My first “Great Basement Clean” happened in July 2012, while Jim was in FL with his Dad. The basement had flooded badly in 2010, so he didn’t have much stored down there, and most of my stuff was still uptown in a storage unit I’d rented after moving to Ipswich a few months prior. There were existing shelving brackets on the right wall, but no shelves. I scouted around the basement and found random pieces of wood to act as shelves. We’d also bought 2 wooden shelving racks at IKEA to help keep stuff off the floor:


The main objective with our cage is to get stuff a couple inches off the floor in case of flooding. The little bit of stuff Jim had down there was mostly in water-tight storage bins. The majority of his stuff was stored up in the 2nd bedroom, which is now my girl cave.
Unfortunately, there was no “Great Basement Cage Clean of 2013”. Because by February 2014, the cage was an absolute disaster area. It was a mix of crap from my storage unit [which I’d canceled], Jim’s crap from the 2nd bedroom [girl cave], and random other stuff we had no room for in the condo. You couldn’t even walk fully in:


So the Great Basement Cage Clean of 2014 happened while Jim was out of town visiting a friend. It was pretty epic:


Back then I didn’t have much of a workshop! Just an old coffee table and a few power tools. The rug was a nice touch, but unfortunately the basement sprouted a leak a few months later and now the floor gets wet every time it rains.
This past January I bought 2 Whitmore shelving units which helped me clear up more space for a workshop area, and gave me room to store my ever-expanding collection of tools and paint:


But the cage was getting cluttered again. My expanding work area [and wood collection] was pushing our other stuff on top of itself:


So I decided to start the “Great Basement Clean of 2015” by tidying up the common areas, of which there are plenty. I did some vacuuming, moved a few things to new homes, then decided to see what was in the dark cave of shelves in the center of the basement, between our cage and the 2nd condo’s cage, and directly across from the 3rd condo’s cage:

That picture is misleading, in the sense that my camera’s flash provided more light than has hit that area in years. It’s usually cloaked in near complete darkness, so I couldn’t even tell how full or empty the area was. I started by hauling all the [heavy!] windows and [not heavy] screens out to the curb, praying that someone would take them. Thankfully a family pulled up in a truck and hauled them all away! Unfortunately I broke 2 of them and had to spend half an hour [with gloves on] pulling all the shards out of the frames and placing them in our recycle bin. Ahem. Then I headed back to the basement and took more flash pictures so I could see what else I needed to move:

Hmmm… random ancient push mower, black tubing, white PVC piping, a box with an old toilet tank in it, a disgusting bucket on the floor, reams of plastic, some absolutely ancient paint cans [I opened a couple and the paint was solid as a rock], a bag of potting soil that had petrified into cement, and a small box with white tiles matching the ones in our front hall, laundry room, and master bath – score! There’s been a cracked tile in the master bath forever, but I figured I’d never find an exact match to fix it. Now I can! Woohoo!
The push mower is the only thing I’m not sure what to do with. It’s too cool to toss but too heavy to move very far [there was no way I could have hauled it up the stairs to the curb – it’s seriously heavy]:


If any of my readers in the area want or need an antique push mower [Ab? Christyne?] it’s free for the taking! If we had grass I’d totally keep it – I’ve always wanted one! It makes a cool thwacking sound as you roll it around.
Everything else went to the curb:

After everything was removed, I used my shop vac to give the shelves a good clean. Then took another few pictures with my camera flash to see what it looked like. Wow!!! Look at all that available storage!!!


Then I began moving shit from our cage to our new shelves:


Ah, the sweet smell of organization! That’s all the stuff we want/need to keep, but don’t use very often. It makes sense to have it stashed over there versus taking up valuable [cough workshop cough] space in our cage.
I also made a pile of crap in a narrow bit of “no man’s land” to take to the dump/transfer station – it’s stuff that didn’t get taken from the curb + crap from our cage that isn’t fit for the curb:

Then it was back to our cage, where I got started with more organizing. I decided my first task would be to finally create actual shelves for the wall brackets on the right of our cage. When I’d first moved in [as mentioned above], I grabbed whatever scrap wood I could scavenge. 2 of the 4 shelves had OK wood, but the top one and the bottom one had crap wood that made stuff fall off the shelves all the time. I remembered that I’d bought an 8 foot 2×4 at Home Depot last week for only $2.50, so I went back and bought 5 more – compared to the cost of 2 pieces of 1×8 pine, it was a much cheaper alternative! Three lashed together are the perfect depth for the wall brackets. I used a wood cart for the first time [versus a shopping cart with my wood jutting out at dangerous angles]:

Back in the cage, I lashed them together using the same flat tie plates I’d used on the cat enclosure door and frame:

Then placed them on the wall brackets – perfect!!!


I had also ordered 2 more Whitmore shelving units for the cage last week, knowing that the basement cleanup was on my radar. I set them up and was able to utilize some spare catio wood to make solid shelves for my smaller items:

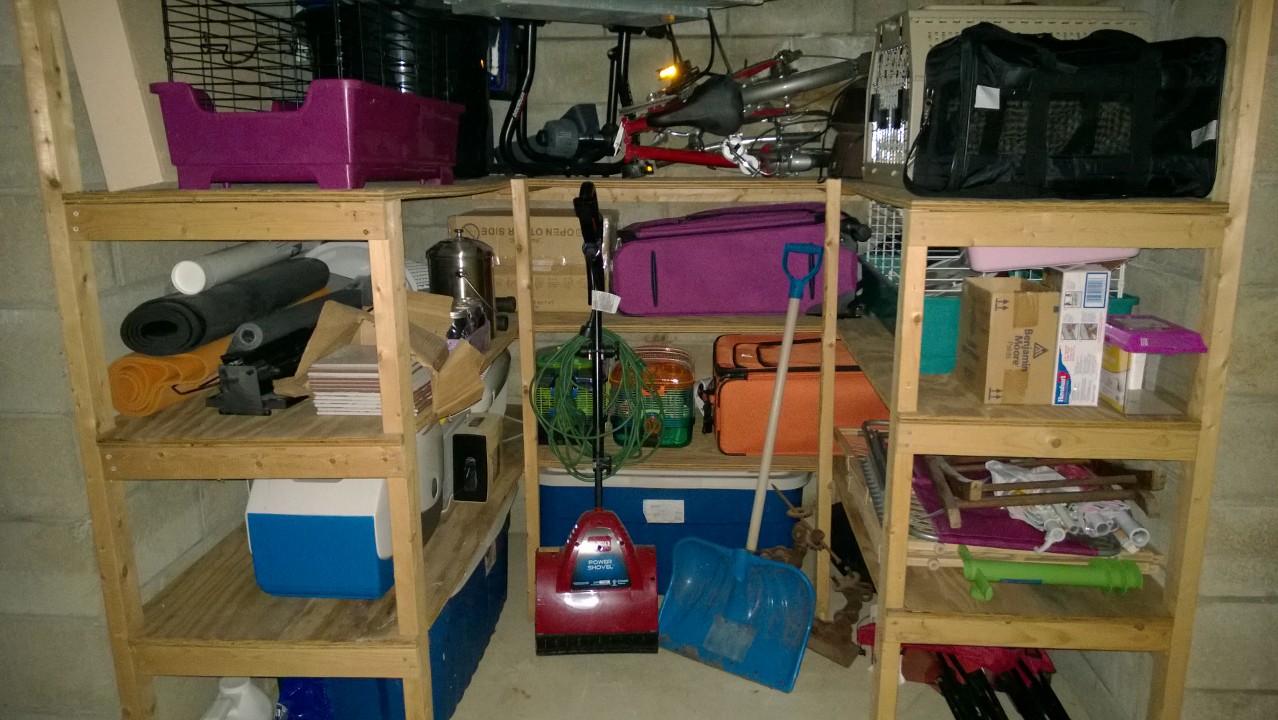
Here’s what our cage looks like today:


Plenty of room to work and move around! And store my craft supplies, glass-cutting supplies, tools, safety gear, paint, spare wood, etc. 🙂 My work bench [Black & Decker WorkMate] is now directly under the one hanging light, which is going to be a huge help. You can see the stairs up to our kitchen in the 2nd picture:


I’m so excited to be done! Ten hours of work… totally worth it! If a “Great Basement Cage Clean of 2016” becomes necessary, I’ll have to find somewhere to stash hubby for the weekend – maybe he can visit his friend Jen in CA 🙂 When he’s home all I want to do is hang out with him. When he’s not home, all I want to do is organize stuff.
I did such a great job in 2015 that I didn’t have another Great Basement Clean until 2018!
Our condo cubby is available for your expertise any time your ready !!
HA HA HA!!! You have a nice cage. Very orderly and everything is labeled – that is one step ahead of ours!
omg Alison, I’m exhausted after reading that. It’s amazing how much you accomplished – I’m super impressed, but still exhausted!
Ya, it was fairly exhausting!!! I didn’t plan to do anything all weekend – I was going to relax and bask in the joy of having the cat enclosure done. But then I made the mistake of starting on the basement… once I start I can’t stop!