Hubby was gone this weekend, helping a friend in need, so I was planning to devote the entire weekend to DIY. That didn’t work out as well as I’d planned. However, I did get 97% of the laundry room painted! Woohoo!
Saturday I did nothing except lay on the couch watching some very eye-opening food-industry documentaries on Netflix…
On Sunday I started in the laundry room by taking down the wall shelves over the washer and dryer and moving everything out of the room. Once those were down, I carefully pulled the washer and dryer away from the wall, so I could squeeze in behind them to paint. Before painting, I decided I should clean the lint vent and tube nods. I’ve read that you should do it every year, but I don’t think most people do…
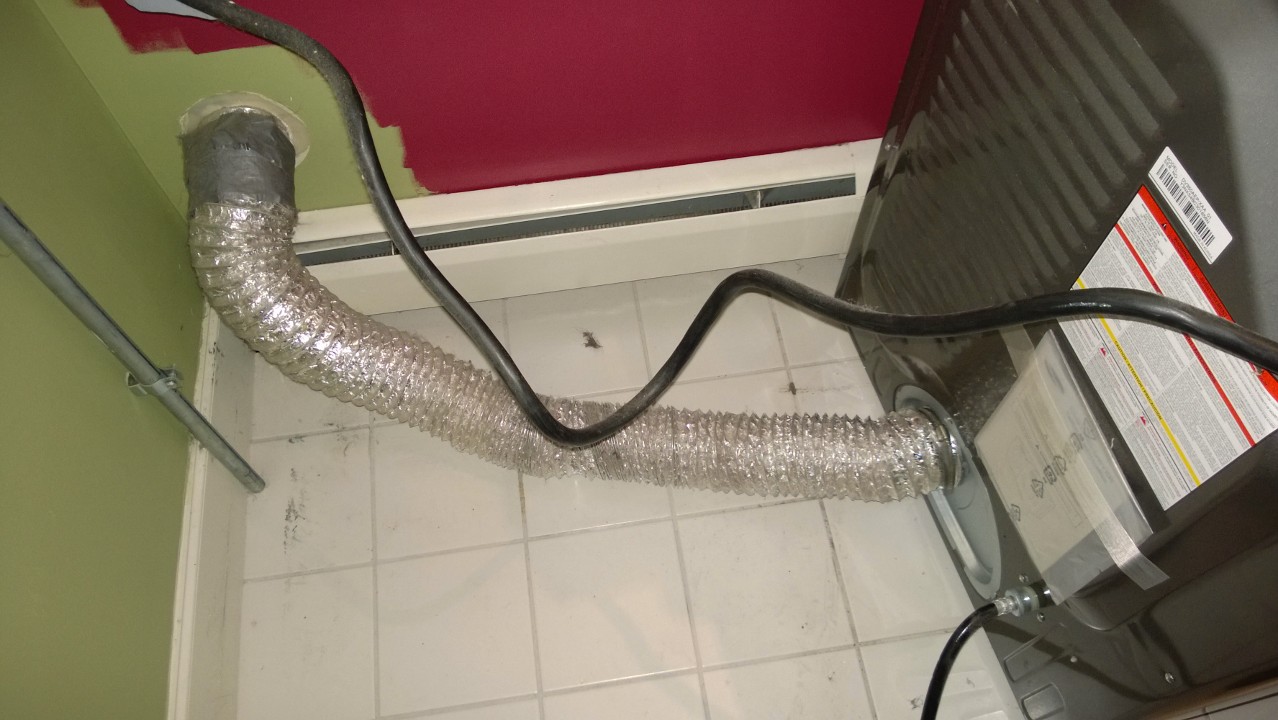
I started behind the dryer by carefully unscrewing the clamp connecting the vent tube to the back of the dryer. A quick peak into the hole showed me that part at least was very clean!
Then I un-taped the other end of the tube, which was connected to the wall with very dirty duct tape, and peaked inside. Not too bad – a little bit of lint near the vent leading outside, which I vacuumed up. Then I stood up with the vent tube dangling in one hand and gave it a shake to see what would come out. Bad idea!!! I’m getting allergy shots for dust mites, but I’m still relatively allergic to them. Shaking the tube created a HUGE dust cloud… totally didn’t think that one through! But overall, once the dust cleared, there wasn’t a whole lot on the floor to vacuum up.
When I detached the taped end from the wall, I realized the vent tube had sort of disintegrated a bit under the tape, and looked like a slinky wrapped in traumatized tinfoil. So, using my handy wire snips, I cut off the shredded part and re-taped it to the wall with fresh duct tape. Then re-clamped the other end back to the dryer.
Moving around to the front of the dryer, I removed the dryer lint filter from just inside the door, and used a flashlight to peer into the hole. Lots of lint trolls nesting in there! I grabbed the new lint vent brush [#affiliate] I bought on Amazon a few weeks ago, made a sweep, and a big bunch of lint came out on the first try. I managed to get most of the remaining lint with a few more sweeps. Then I replaced the lint filter and ran the dryer for a few minutes to clear the tubes and blow out any remaining lint I’d knocked loose. I could hear it cartwheeling through the tube on it’s way to freedom.
Dryer vents: CLEAN!
After a quick break, it was back to the laundry room to tape off the edges of the two remaining green walls. Then three coats of Night Flower, and done! Notice all the orbs in the photos – that’s dust still floating around in the air from when I shook the vent tube… like two hours prior… D’oh!
I only have a tiny portion left to paint, which is just inside the door, in the space right above the door. Once I can fully push the machines back against the wall [probably this weekend] I’ll have room to set up the ladder and paint that small part, then I’ll be totally done! I love how the deep raspberry looks against the grey laundry machines. It will look less cluttered once everything is back up on the wall shelves!
This post is dedicated to Holly:


