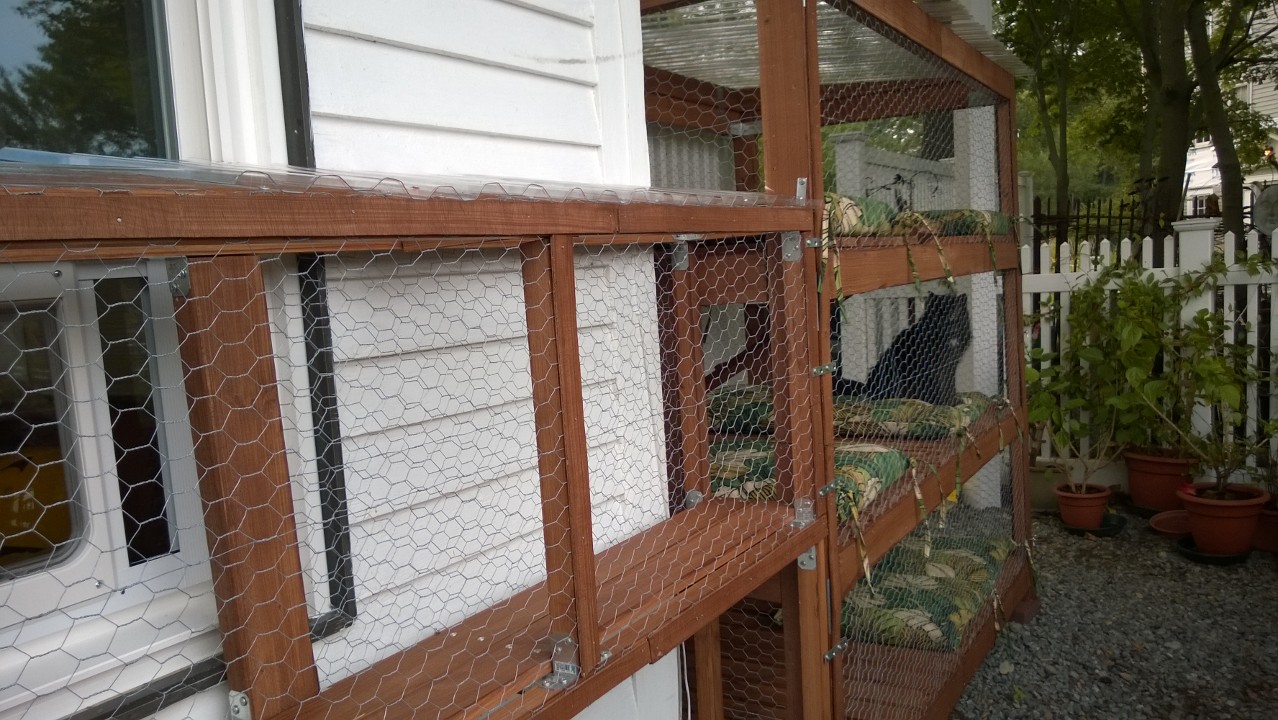
OMG!!! I can’t honestly believe it’s done. It’s consumed so much of my time and thoughts for the past 2 months. But it’s actually DONE! To see a SLIDESHOW from start to finish click HERE.
The last few steps were creating a base for the connector and attaching the connector to the house and catio. On Monday after work I zoomed up to Home Depot and bought the wood and brackets I needed for the legs and base of the connector:
I bought 5 2x2x6’s [and one 2x4x8 which I didn’t need yet, but it was on sale for $2.50 so I couldn’t resist]. After returning home I cut everything down to size, including the 4 legs:
On Tuesday after work I stained the wood for the legs and bottom frame of the connector, and bracketed the frame together:
Then I brought everything outside, flipped the connector onto it’s back, bracketed the legs to the connector, then the connector base to the legs:
Then flipped it back over to it’s rightful position, and placed it up against the house and the window with the cat door:
Perfect fit – hooray!
I also bolted a 2×2 to the top back of the connector, which will allow for the roof to be slightly slanted:
Here’s what it looked like from inside the house:
On Wednesday after work, even though it was 95° in our back yard, I spent an hour and a half finishing things up! By then I was feeling very un-well and had to stick my head under cold water for 10 minutes to stop feeling nauseous, but it was so worth it!
I started by staining some thin, luan slats and nailing them up over the chicken wire staples lining the perimeter of the connector:
Then I pulled the connector away from the wall so I could access the side of the catio. I pulled the catio away from the house so I could cut a hole in the side matching up with the end of the connector. After cutting some of the chicken wire away, I bracketed a 2×4 to the catio frame and re-stapled the chicken wire to that, leaving a 10.5″ wide doorway:
Then I shoved the catio back to it’s regular position:
Moved the connector back into place, and bolted it to the catio with horizontal braces:
Then I bolted the other end of the connector to the house:
At that point all I had left to do was the roof, but I was just too damn hot.
This morning before work I got most of the roof bolted on:
And I started training Bonkers on using the swinging cat door. He is very motivated by treats so it didn’t take much convincing before he got the hang of pushing on the door and entering the connector and catio:
Darwin, however, was terrified of the cat door anytime it moved. Meh. Hopefully he’ll get the hang of it, too!
Today after work I bolted the final roof tile on, making the cat enclosure 100% DONE!!!
I tied the cat door open with string and both boys went in and out about 5 or 6 times, lounging in the catio, then heading back into the house. It was awesome!!! Bonkers decided his new favorite spot is in the dining room, on the sideboard, sprawled in front of the cat door. Hubby figures he’s probably making sure Birdie doesn’t get into HIS catio:
Some random shots from the yard while I was working:
Happy Darwin:


I just finished my giant catio last weekend and your blog helped me with ideas along the way, thank you! We have the same stain, chicken wire, and roofing. It’s amazing how much work it wound up being isn’t it?! Yours is beautiful. So worth it for our best kitty friends 🙂 Thanks again!!
Awesome! That’s great to hear, Kira! Soooooo much work, but so worth it. I hope your kitties love it! Do you have a website with pictures?
Proud Dad too…
Thanks, Dad! Couldn’t have done it without your help!!! Which includes all the DIY knowledge I absorbed by watching you build stuff when I was younger, and also for your invaluable advice regarding the strong-tie connectors and door design!!! You and Mom were life savers!
Exciting! I’m sure they will get used to the cat door quickly. Also, that picture of the bead of water on the blade of grass is awesome.
Thanks, Jessica! I’m loving the wide-angle lens I found in my camera bag for my Nikon DSLR – I didn’t even know I had it! It’s super fun to play around with 🙂
What an awesome playground for the kids! You did a fantastic job! I have no doubt that Bonkers is blocking the way, just like my Lacy does. I hope Birdie learns to love it, too.
We hope Birdie gets curious and decides to check it out! Especially now that she and Bonkers seem to have declared some sort of truce… a very cold-war truce, but at least it’s something.
Now that you think it is done you can add a shelf to the bottom of the connector to grow cat grass. Also put a hook in the main part and grow catnip as a hanging plant it will add shade and skunks who really like catnip wile not be able to get to it, just make sure it is close enough to the side to water. This is of course if you want more projects.
I love those ideas, Ab! I’m actually already growing some cat grass to put in the enclosure. I love the cat nip idea 🙂
You deserve about 1,000 gold stars for this project. I’m sure you didn’t realize when you started what a HUGE project it would become. And your finished product is both functional and BEAUTIFUL. You should be very, very proud of your accomplishment!.
Thanks, Mom! I’m very proud of myself 🙂